Monday 28 October 2013

Homemade Rosy Gloss

rosy gloss,homemade gloss

Gather your ingredients. This pretty lip gloss requires ingredients you can find at most health food stores. Gather up the following supplies:
1 tablespoon Shea butter
2 tablespoons sweet almond oil
1 tablespoon chopped beeswax
5 drops vitamin E oil
An old tube of lipstick in the color of your choice
Get your containers ready. Set out your lip gloss pots or tubes to ready them for pouring.
Melt the beeswax in a double boiler. Place it in the top part of a double boiler and simmer the wax until it melts entirely. Stir it until it's nice and smooth.
Add the shea butter, almond oil and vitamin E oil. Stir the ingredients with the wax until your mixture is smooth and glossy.
Use a toothpick to break off a piece of lipstick into the pot. Stirring in a small chunk of lipstick in any color you like will tint the gloss a lighter version of the same hue. Stir the lipstick well until it's completely combined with the gloss ingredients.
For darker lip gloss, add the entire stick of lipstick and stir well.
Add 5 few drops of rose extract or another scent if you'd like.
Pour the lip gloss into containers. Wash the pot right away so it doesn't end up permanently caked in gloss.
Let the lip gloss set. It's ready to use after 2 hours or overnight, once it has completely cooled.
Make sure you put your lip balm/gloss in a clean container.
Containers: You can usually find some nice tins or pots at the dollar store. At craft stores, you can sometimes find twist-up 'lipstick-like' containers.
Flavorings: You can purchase flavoring and scents for lip gloss from any good craft store; beeswax can also be purchased at the craft store or a health food store. At the grocery store you can pick up the sunflower oil and flavorings such as mint extract.

Homemade Peppermint Gloss

homemade gloss,peppermint gloss
Gather your ingredients. This type of gloss requires a little more forethought, but the results are well worth the extra effort and expense. You'll need the following natural ingredients to make peppermint lip gloss:
2 tablespoons coconut oil
2 tablespoons olive oil
1 tablespoon chopped beeswax
5 drops peppermint oil
Have your containers ready. This type of lip gloss hardens pretty quickly, so you'll want to have your containers on hand for when it's ready to be poured. Use small chapstick pots or tubes, or you can pour the entire mixture into a small mason jar.
Heat the wax in a double boiler. Beeswax is hard at room temperature, but when you melt it and mix it with other ingredients it creates the glossy, waxy texture you want to achieve. Place the chopped beeswax in a double boiler and simmer it until it's entirely melted.
Mix in the other ingredients. Place the coconut oil and olive oil in the pot with the beeswax. Use a spoon to stir the ingredients well. Add the peppermint oil and stir.
For looser, oilier gloss, you can add an extra teaspoon of coconut oil.
For a more subtle mint flavor, use only 2-3 drops of peppermint oil.
Pour the mixture into containers. Carefully pour it into your pots or tubes. You'll want to rinse the pot right away before the gloss hardens.
Let the lip gloss set. Wait 2 hours or overnight to use the lip gloss. It's ready to use once it's completely cooled.

Mariam Sikander Jewellery Designs 2013 For Women

Mariam Sikander is known as being one of the most famous and yet one of the fastest growing popular fashion designers. This designer is basically based in Dubai and in just minimum time scale she has earned huge sum of success and reputation. Mariam Sikander has been linked with the tight knot inside the fashion market since 2010. She has been just serving out the fashion lovers in providing out with the gorgeous and dazzling looking jewellery collections that are set in the categories of the formal, casual and wedding wear. The best thing about Mariam Sikander is that she makes the use of adding with the traditional and modern form of the designs that simply make her collections attention grabbing by the end of the day.

Mariam Sikander ,Jewellery Designs 2013,

Mariam Sikander ,Jewellery Designs 2013,

Mariam Sikander ,Jewellery Designs 2013,

Mariam Sikander ,Jewellery Designs 2013,

Mariam Sikander ,Jewellery Designs 2013,

Mariam Sikander ,Jewellery Designs 2013,

Mariam Sikander ,Jewellery Designs 2013,

Mariam Sikander ,Jewellery Designs 2013,

Mariam Sikander ,Jewellery Designs 2013,

Latest Fall Collection Winter 2013 For Ladies By Ayesha Khurram

Ayesha Khurram has emerged on the screen as the mission is indeed a prestigious space in this field.Ayesha Khurram offers casual wear, party wear and formal wear dresses for every season and drop Khurram occasion.Ayesha dress designs 2013 women and  girls. have launched just now.In this collection are stunning and stylish dresses were added in simple styles of fashion.

Latest Fall Collection, Winter 2013,  Ayesha Khurram,casual wear

Latest Fall Collection, Winter 2013,  Ayesha Khurram,casual wear

Latest Fall Collection, Winter 2013,  Ayesha Khurram,casual wear

Latest Fall Collection, Winter 2013,  Ayesha Khurram,casual wear

Latest Fall Collection, Winter 2013,  Ayesha Khurram,casual wear

homemade lip balm recipes

homemade lip balm recipes,lip balm,beauty tips

Spoon some petroleum jelly into a bowl. Make sure it's a microwave-safe bowl, and not a metal one. Use as much petroleum jelly as you want. You can make an entire container of lip gloss is you want to use the whole jar.
Melt the jelly in the microwave. Place the bowl in the microwave and zap it on "high" for about 30 seconds. Take it out of the microwave and give it a stir. If the jelly is still clumpy, microwave it again until it's smooth and runny.
Add some scent or flavor. You can scent or flavor the petroleum jelly by adding a few drops of your favorite essential oil or extract. Try rose, almond, vanilla, cinnamon, lavender, or another favorite.
Add a spoonful of honey. This will give the gloss some shine and make it taste a little sweet on your lips. Since honey has antibacterial and moisturizing properties, it's also great for conditioning your lips and keeping them from drying out.
If you don't want to use honey, you can skip this step. Your lip gloss will still be shiny.
If you want to use a different type of sweetener, that's totally fine. Just know that your gloss might not last as long this way, because sugar, maple syrup, and other sweeteners go bad after awhile.
Stir it up. Take a spoon and stir the mixture together until the ingredients are smooth. If you want, add more honey, extract or essential oil to change the way it smells and tastes.
Pour it into a container. You can use the original petroleum jelly container or pour it into a cute makeup pot or old lip gloss container
Let it set. Set it out at room temperature or put it in the refrigerator to let it cool down. Don't use it until it's no longer runny. This lip gloss will stay a little soft, so the easiest way to apply it is with your finger or a makeup applicator brush.

Saturday 26 October 2013

homemade fragrances for rooms

homemade, fragrances for rooms

Fill a spray bottle with water and add 10 drops of lemon grass essential oil and 10 drops of sweet orange essential oil. The smell is amazing and you can use it on the furniture, bedding, carpets and as a refreshing mist.

homemade, fragrances for rooms

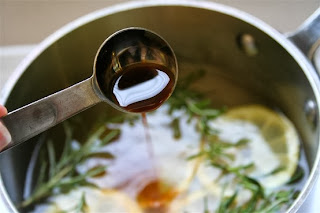
A few sprigs of rosemary, lemon slices and a teaspoon of vanilla in a pot and let it simmer on the stove.

homemade, fragrances for rooms
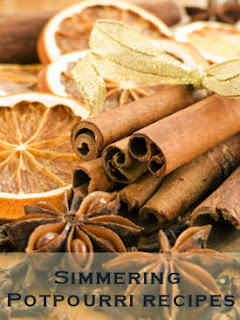
Simmering potpourri is a lovely way to make your home smell warm and inviting, especially during the holiday season when you use fragrant spices like cinnamon and cloves.
Cinnamon Sticks, Oranges & Spices
Cinnamon Sticks, Orange Slices & Spices
How It Works: Just fill a pot with water, add your favorite ingredients and simmer all day. This also helps humidify the home a bit.
The recipes below are just guidelines, you can use different amounts and mix up ingredients as you like. Save: Orange, lemon and lime peels, apple skins (dry them out first before storing in a container) and add assorted spices. Experiment to find your favorite aromas!
Directions:
Fill a saucepan with water and bring to a boil. Add the ingredients from your favorite recipe, boil for a few minutes, then turn the heat down to simmer all day. Top up water as needed.
Caution: Set your timer for 30 minutes so you remember to top up with water. You don’t want the pot burning dry. Do not leave the house with this left heating on the stove.
Recipe #1
Cinnamon sticks
Apple peels
Orange rinds
Whole cloves
#2
Apple juice
Cinnamon sticks
Whole cloves
#3
Vanilla (a few drops)
Orange peels
#4 – Christmas Potpourri Simmering Pot
3 sprigs evergreen or handful pine needles
2 cinnamon sticks
2 TBS whole cloves
2 bay leaves
2 pieces orange rind
2 pieces lemon rind
#5
2 TBS whole cloves
2 cinnamon sticks
5 star anise
1 orange peel
#6
Whole cloves
1 tsp nutmeg
#7
Peel from a whole orange
Whole cloves
2 Cinnamon sticks
#8
5 bay leaves
1 TBS whole cloves
2 sticks cinnamon
#9
Peel from 1 lemon
Peel from 1 orange
2 bay leaves
3 cinnamon sticks
2 TBS whole cloves
#10
1/8 cup cloves
1/8 cup allspice
2 cinnamon sticks
#11
6 whole cloves
1 cinnamon stick
1 tsp vanilla
#12
1 cup dried lavender
1 tsp anise
1 TBS nutmeg
1 TBS whole cloves
1 Cinnamon stick
#13
2 sticks cinnamon
Peel from one lemon
Fresh rosemary
Whole cloves
Winter Freshener:
2 cups dried rosemary
2 cups dried lavender
1 cup dried eucalyptus leaves
1/2 cup dried peppermint or spearmint
1/2 cup dried bay leaves
Directions: Keep stored in an airtight container then add 1 cup of mix per 3 cups boiling water.
Fragrant Slowcooker Version:
1 cup dried lavender leaves
4 cups dried rose petals
1 tsp. anise seed
1 TBS ground nutmeg
1 TBS whole cloves
1 cinnamon stick (broken and crushed into pieces)
1 TBS crushed benzoin fixative
5 drops jasmine oil
5 drops patchouli oil
5 drops rose geranium oil
5 drops rosemary oil
Directions: Mix all ingredients and store in a glass container for 1 month before using (store in dark location). Fill crockpot halfway with water, add 1 to 2 cups potpourri then turn the heat on low (lid off). Source: Company’s Coming Slow Cooker Recipes (by Jean Pare).
For the Oven:
Preheat oven to 350 degrees. Take a piece of tinfoil (a few inches wide), pour a teaspoon of vanilla on top and place the foil in the oven. Turn off oven and prop the door open a bit.
Fill a loaf pan with water and your favorite recipe from above. Set in oven on high heat until it starts filling your home with lovely smells. Turn off oven, then prop the door open.
homemade, fragrances for rooms

You will need:
1 cup water
1/4 cup white vinegar
10 drops of peppermint essential oil
Combine the water and vinegar. Add in the peppermint oil.
Place in a re-purposed spray bottle and use liberally whenever a room needs a little freshening up.


Herbal Bath & Shower Bags

Herbal Bath , Shower Bags, beauty tips

Bath sachets (also known as bath tea) make a lovely, luxurious soak that can be beneficial to skin, ease stress and help soothe aches and pains.
IngredientsThey’re similar to Shower Spa Bags (details at bottom of page) except these steep in the tub, making a luxurious soak. If some tender therapy is needed to ease sore feet, you can try these foot soaks.
Basic Instructions:
Make drawstring pouches out of cheesecloth, organza or muslin, enough to hold anywhere from 1/4 cup to 1/2 cup of a favorite herbal mix. Tie them tightly shut so the loose ingredients won’t float out. After use the contents can be emptied, the pouches rinsed out then washed to be refilled and reused.
Preparation:
Two ways these can be enjoyed, either hang them on the tap while the hot water is running, making sure the water is running through them. Once the tub is filled, let them float around.
Infusion Method: Boil a quart of water, turn off heat, add pouch, cover, then steep (for at least 20 minutes for best results). Add the piping hot infusion (and the bag) to a full tub, being careful while pouring to avoid burning yourself.
Note: Do not steep in an aluminum pot.
How about some nice teas? These amounts will make a batch at a time to be stored in an airtight container until needed. For convenience, fill up drawstring pouches then store.
Basic Starter:
1 1/2 cup powdered milk
1/2 cup Epsom salt
1/8 cup baking soda
2 TBS cornstarch
This is the base and add whatever dried flowers and herbs are preferred.
Heavenly:
1/2 cup lavender
1 cup Epsom Salts
Floral Deluxe:
1 cup oatmeal
1/2 cup lavender
Splendor:
1/2 cup powdered milk (or the starter recipe above)
1/2 cup oatmeal
1/4 cup lavender
Soothing Mix:
1/2 cup Oatmeal
1/4 cup Rosemary
1/4 cup Chamomile (tea is fine)
Chamomile Brew:
1/2 cup each: Epsom salt, lavender, chamomile
Splendor Blend:
1/2 cup each: thyme, sage, lavender, mint, bay leaves, rosemary
Soother:
1/2 cup each: Lavender, Rose Petals, Sage, Rosemary
Basil Blend:
1/2 cup rosemary
1/2 cup basil
1 cup oatmeal
Bonus Idea: Also add 1/2 cup of honey to the tub while the water is running. Or mix the starter with honey.
Prefer something for the shower? Start the day with a pampered feeling by filling a cloth pouch with the ingredients below then use them to scrub and exfoliate.
The fabric can be muslin, handkerchiefs, cheesecloth, or even strips of nylon pantyhose cut to size then knotted at both ends (good for repurposing ruined nylons).
Tie the end securely closed with a rubber band.
Size them to fit the palm of your hand. Fill as full or as loosely as you like.
Ingredients:
2 parts coarse oatmeal
2 parts mixed dried herbs
1 part grated soap
Tip:
Make a batch ahead of time, just store in an airtight container.

Hardwood Floor Cleaners & Tips

Hardwood Floor,hardwood floor Cleaners & Tips,tips for floor cleaning

Here are several different recipes for mixing up your own cleaners for hardwood flooring, just a few simple ingredients are all that’s needed. Keep in mind that a little goes a long way, you just need enough liquid to dampen the mop (or cloth) and scrub away.
If you’re happy to damp mop with straight water, try adding about 10 drops of essential oil per gallon of water for extra cleaning muscle. Some suggestions: lavender, tea tree oil, pine or eucalyptus oil will add antiseptic qualities.
You’ll also find tips on this page for removing scuff marks, how to test for wax (and remove it), a few DIY polish recipes and a scratch repair method that may surprise you.
Getting Started: Sweep or vacuum surface to remove as much dirt and dust as possible.
Directions:
When using one of the recipes below, damp mop only. Saturating the floor with liquid may cause spotting or warping of the surface. You can either lightly spray one section at a time or lightly spray the mop head.
Scrub in the direction of the grain of the wood to grab and remove as much of the dirt as possible.
Wipe dry with a soft cloth after washing.
Mix 1 gallon warm water with your choice of the ingredients below…
Solution #1
1/4 cup vinegar
1 TBS castille soap
Solution #2
1 cup white household vinegar (*Is it safe to use? See notes below)
Solution #3
1/4 cup borax
1/2 teaspoon mild dish detergent (liquid)
Solution #4
1 cup vinegar
10 drops peppermint essential oil
Solution #5
1/8 cup mild liquid dish soap
1/2 cup vinegar
Solution #6
1 TBS Dr. Bronner’s liquid soap
1/8 cup vinegar
1/4 cup brewed black tea
Tea Mixture:
Steep 1 bag of tea in 2 cups of boiling water and leave until it comes to room temperature. Remove tea bag and soak cloth in liquid, wring out then wipe floor clean. Dry with a soft cloth. The tannic acid in the tea will help bring wood to a shine.
For Oil-Finish: Damp mop with straight water after first cleaning with the recipe below.
1 TBS rubbing alcohol
2/3 cup hot water
*Is vinegar safe to use? Isn’t it too acidic for hardwood?
If you poured a bottle of vinegar directly on the floor and allowed it to sit, it would most likely damage the surface. However, in the mixtures above it is well diluted and only used as a damp mop (meaning excess liquid is squeezed out). Vinegar is an excellent household cleaner and brings a lot of muscle to the job. If you’re concerned about the effects it may have on the finish over the long-term, consider doing a clear water rinse after wiping floor with a mixture that has vinegar as an ingredient (then wipe dry as usual).
Removing Scuff Marks

Keep a spray bottle with a mixture of 50/50 vinegar, water and about 15 drops of essential oil of your choosing.
Sprinkle scuffs with baking soda then spray solution, let fizz for a few seconds.
Scrub marks until they are removed then dry with a soft towel.
Wax Testing & Removal

Wet your fingers with water then flick into a corner of the floor where there’s not much traffic. If there’s wax on the surface, the floor will turn white under the water beads (may take a half hour or so to turn white).
To Remove Wax:
Scrub the surface with mineral spirits using a household sponge with a nylon scrubby side. Wipe dry with a soft cloth as wax is dissolved. Repeat process a second time if needed.
DIY Polish

Wash surface as usual and dry thoroughly. Using one of the mixes below, apply polish to surface then wipe dry with a soft cotton towel.
Recipe #1
Mix equal parts olive oil and white household vinegar.
Recipe #2
1/4 cup vegetable oil (or olive oil)
2 TBS cider vinegar
3 TBS vodka
Recipe #3
1 TBS olive oil mixed with 1 tsp lemon juice. Apply to a clean, dry mop and treat floors after cleaning.
Quick Tip: You can also spray commercial furniture polish onto the mop head and then wipe over surface.
Scratch Repair

Rub a crayon that is the same color as the flooring into the scratch, filling the space as full of the wax as you can.
To seal in place, heat with a hair dryer to soften the wax, allow to cool for a few seconds then buff with a soft cloth.

Friday 25 October 2013

18 Homemade Sugar, Sea Salt & Oatmeal Scrub Recipes

Homemade scrub, Sugar, Sea Salt, Oatmeal Scrub, Recipes


Scrubs are a luxurious way to pamper skin since they exfoliate and moisturize at the same time and will leave skin feeling smooth and soft.
There’s no need to buy expensive stuff, make it yourself for a quick and easy way to have a spa experience right at home. They make great gifts too!
Here’s a bunch of recipes to get started with, I’ve sorted them into separate groups for easier browsing.
First a few tips:
Mix and store ingredients in glass bowls and jars to prevent reactions with other materials.
Shelf life is only a couple weeks or so (if kept cool in an airtight container) unless a preservative of some sort is added. You’ll find more information and preservative suggestions here: fromnaturewithlove.com (info on using T-50 Vitamin E Oil, Rosemary Oil Extract, Grapefruit Seed Extract and more).
Refrigerate any unused portion in a sealed container.
For something different, try adding a bit of gentle liquid soap to scrubs before using.
Use a loofah or bristle brush when applying, will give a nice massage while exfoliating.
When using the salt recipes, some believe that those from the Dead Sea are the most therapeutic since they help relieve pain from arthritis and bring a glow to skin.
Note: Substitutions used in the ingredient lists below:
C = cup
TBS = tablespoon
tsp = teaspoon
G-W-S = Granulated White Sugar
B-S = Brown Sugar
EO = Essential Oil
EVOO = Extra Virgin Olive Oil

sugar scrubs.......

Almond Oil & Vanilla
1/2 C of B-S
1/4 C of almond oil
1/4 C of liquid Ivory hand soap
1/4 tsp of vanilla

Lemon
1 C G-W-S
1/2 C EVOO
1 TBS lemon zest (grated)

Tea
2 C G-W-S
1 C honey
2 TBS tea
5 drops vanilla

Lavender & Rosewood
1 C B-S
1/4 C almond oil
1/2 tsp vitamin E
6 drops rosewood EO
4 drops lavender EO

Yogurt
3 TBS baby oil
1 TBS yogurt
1 TBS G-W-S

Aloe Vera
1 C G-W-S
1 C EVOO
2 TBS aloe vera gel
8 drops EO (of your choice)

Coffee
1/4 C packed B-S
1/4 C G-W-S
3 TBS fresh coffee grounds
5 tsp almond oil
5 tsp jojoba oil
2 tsp honey
1 tsp vitamin E
1 tsp vanilla

With Powdered Milk
1 C B-S
2 C powdered milk
1 C EVOO
10 drops EO
To make: Mix the dry ingredients first then pour the EVOO slowly, stirring the whole time. After it’s at the desired consistency, mix in the essential oils. This was sent in by Charlotte, thanks!

For Hands & Dry Trouble Spots
2 tsp chopped rosemary
1/8 C EVOO
4 tsp almond oil
1 tsp lemon oil
B-S (or raw sugar)
Directions: Mix chopped rosemary with the oils first then add sugar to make a paste.

 sea salt scrubs.................
Exfoliating
1/2 C fine sea salt
1/4 C oatmeal (ground, uncooked)
1/4 C flaxseed oil
1/4 C EVOO
8 drops geranium oil

Lavender
1/4 C fine sea salt
1/4 C EVOO
3 to 5 drops lavender EO
Tip: Add a bit of water or liquid soap while using.

Favorite Scent
3 C fine sea salt
3/4 C EVOO
3/4 C sweet almond oil
choice of EO
Mix ingredients together then use after showering, store in a sealed glass jar.

Peppermint (for feet)
1 1/2 C fine sea salt
1/3 C EVOO
3 drops peppermint EO
Exfoliate soles and heels with this mixture after a bath or foot soak.

oatmeal scrubs.......
With Yogurt
1 C oatmeal
1 C plain yogurt
With Honey
1/2 C oatmeal
1/4 C honey
2 tsp aloe vera gel

Yogurt & Honey
1 TBS oats
2 TBS yogurt
1 tsp honey

Strawberry
1/4 C rolled oats
4 to 5 fresh strawberries
milk
Trim the berries of their leaves then mash, mix in the rolled oats then add enough milk to make a paste.

Lavender
2 C oats
1/4 C dried lavender buds
Mix then grind in a blender until it’s a powder, store in a sealed glass jar and keep in a dark location. To use: mix about a tablespoon of powder with enough water to make a paste. Gently massage into skin then rinse with clear water.

5 Homemade Foot Soak Recipes

Homemade, Foot Soak ,Recipes,foot care
One way to soothe and pamper tired, achy tootsies is to soak them in a hot foot bath. Here are a handful of recipes to try, each are easy to make using simple ingredients.
IngredientsThey can be whipped up in large batches if preferred so you have a stock on hand or package nicely and give away as gifts (sealed in glass jars).
Directions: Unless otherwise noted, mix together all ingredients thoroughly then store in an airtight container.
Use 2 to 3 tablespoons per gallon of water used.
Water temperature is at personal preference, but I find the hottest my feet will comfortably tolerate gives the most relief.
Basic
1 part Epsom salts
1 part Baking soda
drops of choice EO (optional)
Chamomile Tea: #2
4 bags chamomile tea
1/8 cup dried parsley
4 drops EO of choice
Steep in 1 gallon of hot water for 10 minutes before using.
#3
2 cups Kosher salt
1 cup Epsom salts
drops EO of choice (optional)
#4
1 1/4 cups Epsom salts
1 1/4 cups Kosher salt
1/4 cup baking soda
1/4 cup cornstarch
#5
1 cup lemon juice
3 TBS olive oil
1/4 cup milk
Tips

Single Ideas: (added to 1 gallon of water)
1 cup honey
1/2 cup Epsom salts
2 cups brewed coffee
Essential Oils To Try: peppermint, lavender, lemon, orange, eucalyptus, mint
Marbles or smooth river rocks can be added to the bottom of the basin to rub feet over while they’re soaking, quite soothing!


Why Low-Fat Diets Make You Fat

Why Low-Fat Diets Make You Fat,low fats,diet food

Governments here and abroad have been cautioning the public for decades on the dangers of high fat diets. Their claims based on “their science” concluded that it’s best to avoid fat because of its extra calories – and saturated fats raise the risk of heart disease. You’ll still see this on most food pyramids regulated by government policy on diet and nutrition. However, just as mandated healthcare policies fail at the federal level, so do those related to nutrition. This low-fat mantra has been questioned for years by clinicians and nutritional scientists – not least because it has failed to halt the obesity epidemic. The fact is, contrary to official advice by our diet dictocrats, high-fat diets lower blood sugar, improve blood lipids, and reduce obesity.

High-Fat Diets Have Better Effects on Blood Sugar

One of the problems is that there is consistent inverse association in the percentage of energy coming from fats and sugars. Research published in the journal Critical Reviews in Food Science and Nutrition shows why people find it hard to follow government guidelines to cut their fat and sugar intake at the same time — a phenomenon known as the sugar-fat seesaw.

That’s no surprise as previous studies such as a two-year dietary studypublished in the journal Diabetologia showed that food with a lot of fat and few carbohydrates has a better effect on blood sugar levels and blood lipids. Despite the increased fat intake with a larger portion of saturated fatty acids, their lipoproteins did not get worse. Quite the contrary — the HDL, or ‘good’ cholesterol, content increased on the high fat diet.

Research from the Hebrew University of Jerusalem shows that a carefully scheduled high-fat diet can lead to a reduction in body weight and a unique metabolism in which ingested fats are not stored, but rather used for energy at times when no food is available. The results were published in The FASEB Journal under the title “Timed high-fat diet resets circadian metabolism and prevents obesity”.

Outdated Understanding of Science 

Professor David Lawrence, an expert in nutrition and obesity data analysis, said recently in the journal BMC Medicine that the idea the idea of all calories being equal is flawed and based ‘on an outdated understanding of the science’.

Calories from different sources have different effects on the body, with calories from carbohydrates more likely to encourage weight gain.

Calories from different sources have different effects on the body, with calories from carbohydrates more likely to encourage weight gain.

Not only is the calorie theory under attack, but evidence is also emerging to show that lowering fat might not cut heart-disease risk after all.

A major study published in the authoritative New England Journal of Medicine compared the clinical benefits of a conventional low-fat diet with two types of Mediterranean diet, which are naturally considerably higher in fat.

The study had to be stopped early because the heart attack and stroke rate in the Mediterranean options was so much lower it was deemed irresponsible to keep patients on the conventional diet.

Relevance of Glycemic Load 

A study led by Cara Ebbeling, PhD, associate director and David Ludwig, MD, director of the New Balance Foundation Obesity Prevention Center Boston Children’s Hospital, found diets that reduce the surge in blood sugar after a meal–either low-glycemic index or very-low carbohydrate-may be preferable to a low-fat diet for those trying to achieve lasting weight loss. Furthermore, the study found that the low-glycemic index diet had similar metabolic benefits to the very low-carb diet without negative effects of stress and inflammation as seen by participants consuming the very low-carb diet.

Weight re-gain is often attributed to a decline in motivation or adherence to diet and exercise, but biology also plays an important role. After weight loss, the rate at which people burn calories (known as energy expenditure) decreases, reflecting slower metabolism. Lower energy expenditure adds to the difficulty of weight maintenance and helps explain why people tend to re-gain lost weight.

The study suggests that a low-glycemic load diet is more effective than conventional approaches at burning calories (and keeping energy expenditure) at a higher rate after weight loss.

“We’ve found that, contrary to nutritional dogma, all calories are not created equal,” says Ludwig, also director of the Optimal Weight for Life Clinic at Boston Children’s Hospital. “Total calories burned plummeted by 300 calories on the low fat diet compared to the low carbohydrate diet, which would equal the number of calories typically burned in an hour of moderate-intensity physical activity,” he says. 

Though a low-fat diet is traditionally recommended by the U.S. Government and Heart Association, it caused the greatest decrease in energy expenditure, an unhealthy lipid pattern and insulin resistance.

“In addition to the benefits noted in this study, we believe that low-glycemic-index diets are easier to stick to on a day-to-day basis, compared to low-carb and low-fat diets, which many people find limiting,” says Ebbeling. “Unlike low-fat and very- low carbohydrate diets, a low-glycemic-index diet doesn’t eliminate entire classes of food, likely making it easier to follow and more sustainable.”

Some Governments Are Making a U-Turn

Faced with mounting evidence, Swedish dietary experts recently made a dramatic U-turn, recommending a low-carb, rather than low-fat, diet for weight loss.

The bombshell came from the Council on Health Technology Assessment, which advises the Swedish government. Based on a review of 16,000 studies, it said the best sorts of food for losing weight were high fat foods which could include anything oils like olive and coconut.

So the rules are being rewritten: to lose weight, cut down on carbs and eat more fat.

So what, precisely, is behind this new thinking? It comes down to the effect different foods have on your hormones.

The most important of these hormones, and the one that’s crucial for weight loss, is insulin.

Insulin is the hormone that controls fat storage. A high-carb diet increases the amount of glucose in the bloodstream, which in turn means you produce more insulin. The more insulin the body produces, the more fat gets stored. When the body is exposed to a high-carb low-fat meal, the pancreas works hard at overshooting the secretion of insulin which then causes the excess to be stored as fat. A low-carb and high-fat diet means less insulin, making it easier to lose weight because less fat is then stored.

More Calories But More Weight Loss

Dramatic new evidence for this has come from a unique experiment conducted by a personal trainer. As Sam Feltham explains: ‘My business is helping people to lose weight, and if all calories aren’t equal, that could make a real difference.’

A few months ago, Sam upped his intake to a massive 5,000 calories every day. For three weeks he got these calories from a low-fat, high-carb diet; for another three, he ate more fat and cut right back on carbs.

He did exactly the same, moderate exercise regimen each time.

Now, according to the conventional wisdom, the weight gain would be the same on both regimens. After all, a calorie is just a calorie.

In fact, on the low-fat diet Sam stacked on 16lbs around his waist.

But when he ate more fat and cut his carbs, he added just 2.5bs and lost 1in (2.5cm) from his waistline.

‘I’m sure I eat more calories than I burn, yet my weight and waist measurement normally remain the same.’

Sam, who survived childhood cancer (Hodgkin’s lymphoma), wondered if his usual low-carb diet was the key, and set about his experiment to find out.

For the low-carb, high-fat part of the experiment, Sam got his 5,000 calories from foods such as eggs, mackerel (which is very fatty), steak, green veg and coconut oil, interspersed with three snacks of nuts – walnuts, pecans or almonds (which are naturally high in fat).

While 72 percent of his total calorie intake came from fats, 22 percent came from protein and just 5.9 percent from carbs. Each meal was exactly the same every day.

With the high-carb diet, most of his calories (63 percent) came from carbohydrates, 13 percent from protein, and 22 percent from fat.

He ate garlic bread, low-fat lasagna, crumpets, low-fat yogurts and rice pudding, chocolate muffins and wholewheat bread.

Admittedly the types of fat on his high-fat diet weren’t your usual fatty foods, such as cream and butter. And his high-carb diet wasn’t exactly ‘healthy’.

But the point was not comparing the health benefits of the two, says Sam. ‘It was an experiment to test the idea that different foods affect your body’s biochemistry differently. ‘If it is true that cutting calories is the key to weight loss, then excess calories should put on the same amount of weight whether they come from a “healthy” diet full of fat or a poor diet full of carbs.’

He says he was ‘really surprised’ at how little weight he put on with the low-carb/high-fat diet, while on the high-carb/low-fat diet his body fat increased from 12.7 percent of his body weight to 16.9 percent.

Degrading Health On Low-Fat High Carb Diets

While Sam’s experiment was by no means a scientific one, as well as the weight gain, what was even more striking was what an unhealthy effect the high carbohydrate regimen had on standard markers for heart health.

For when Sam had his blood tested after his three weeks on high carbs, ‘the diet effectively gave him metabolic syndrome which is a precursor to heart disease and diabetes.

Particularly worrying was that his triglycerides (fats in his blood) had gone up four times, while his so-called ‘good’ (HDL) cholesterol had dropped.

What’s more, a level of inflammation in his liver had doubled, which is also linked with diabetes and heart disease. “If someone came into my clinic in that state, I’d make it clear they needed to make some serious changes to their diet and start eating a diet low in carbs. I was really surprised that the damaging changes had happened so quickly,” stated Dr. Aseem Malhotra, a cardiologist at the Royal Free Hospital in London.

Did the fact that, as a personal trainer, Sam was obviously very fit at the start of his trial make a difference?

“Absolutely,” says Dr Malhotra. “It is alarming to think that if a high-carb diet can have that effect on him in three weeks, what is it doing to people who don’t exercise and eat like that for years?” 

Standard Dietary Advice is Wrong!

“This is a vivid illustration of the fact that the conventional idea of what causes weight gain is back to front,” says Dr Malhotra. “We’ve been told for years that eating fat will make you fat because it contains twice the calories that are in carbohydrates. That is to misunderstand how fat storage works.”

Research has already shown that if you are eating a high-carb diet, and so have high levels of insulin, you are likely to have more fat in your blood than someone on a high-fat diet.

“This is what happened to Sam.”

Fat Does Not Clog Up Arteries

But doesn’t eating extra fat clog up your arteries? No, insists Dr Malhotra. In fact, he says, it’s too many carbs that are the problem.

He argues that – as seen with Sam – a high-carb diet tends to lower the good HDL cholesterol that helps keep arteries clear.

At the same time, as glucose from carbs is turned into fat for storage in the body, fatty acids are also produced.

It is this combination of fatty acids and low HDL, not saturated fat, that “clogs your arteries,” says Dr Malhotra.

Recent research supports the idea that warning about saturated fat in the diet has probably been a mistake.

“The influence of dietary fats on serum cholesterol has been overstated,” say the authors of a review in Advances In Nutrition in May. “The lack of any clear evidence that high-fat foods lead to adverse health effects makes one wonder how they got such a bad name.”

Demonizing fat and encouraging people to eat more carbs can be harmful to people with heart disease, says Dr Malhotra. “I see patients who have had a heart attack and are trying to lose weight on a low-fat diet and are puzzled because they are gaining weight.”

“When I investigate, it is usually because they are eating lots of low-fat supermarket foods which are also high in carbs such as sugar.” 

“When I get them eating real foods and not worrying about fat, their weight starts to come down.”

Those eating low-carb these days are much more flexible about the amount of fat they get. Research is still needed to sort out the best ratio of carbs to fat.

Western governments have yet to acknowledge the Swedish style U-turn in healthy eating advice. I’ve personally been on many of these public policy and procurement programs investing hundreds of hours of my time trying to convince officials that food pyramids have to be thrown out the window along with many recommended foods they hold praise to. As soon as these recommendations are forwarded to the highest levels, they are dismissed.

We are spending billions trying to cope with metabolic diseases such as diabetes, cancer and obesity and the emphasis on low-fat diets is only promoting the metabolic pathways which encourage these diseases.

The bottom line is to commit to educating yourself on the healthiest nutritional strategies for your health and not follow any recommendations by government, unless perhaps if you live in Sweden.